


Recording a kick drum comes with a unique set of challenges. First, it’s part of one of the most complex instruments you’re likely to record—the drum kit. Second, a large part of its sound involves one the trickiest parts of the frequency spectrum to record and mix—the low end. Finally, the kick drum sound that we hear on many modern records isn’t necessarily what kick drums actually sound like. So, how to best capture a kick drum? With multiple microphones. This article will explore how to capture and create great kick drum sounds with a wide variety of mics, like the AKG D112, Shure Beta 52, Electro-Voice RE20 and others.
Arriving at your desired kick drum tone will require some planning. Typically that will start with assessing the drum you have to record, thinking about its role in the song, and selecting the right microphones for the job.
Tune and Prepare the Drum
First, start by thinking about the song you are recording and the role the kick drum will play in the piece of music.
Different genres can have the kick drum playing different roles in the song and the overall mix. In a jazz song, the kick may only be used very lightly for a subtle pulse or the occasional accent. Comparatively, in an R&B song the kick may be more prominent, acting as a critical element in the groove of the song. A heavy modern rock song might want a lot more high-frequency “click” in the attack of the drum, whereas a more mellow, vintage-inspired song might want that attack to be lower in the midrange of the frequency spectrum, feeling a bit more like a “knock.”
Digging into frequencies a bit further, one song may want the kick to have a lot of sub information, down around 30Hz–40Hz. On the other hand, the focus of the kick might need to be a little higher, in the 75Hz–90Hz range.
You’ll want to consider the natural sound of the kick drum itself. Do you want a tight, “dead” sound? Or are you looking for lots of resonance, with a lot of sustained tone?
With all of this in mind, at the early stages of recording, take the time to prepare the drum itself to make the sound you desire. Pay careful attention to variables, such as the size of the drum, whether or not the front resonant head is on or off, the tuning of the drum and the type of kick beater used. Consider whether or not you want to place any blankets in the drum to deaden the sound. Fine-tuning these elements early in the process will go a long way in helping you reach your end goal for the kick tone. With the instrument dialed in, it’s time to begin setting up some microphones.
Microphone Selection and Placement
Capturing all the useful parts of a kick drum’s tone with one microphone can pose a challenge. Therefore, it’s often helpful to use a few different mics on a kick drum which will give you specific control over the parts of the tone you want to manipulate. One simple way to think about the roles that each mic will play is to consider what part of the sound you want each to capture. You’ll probably want to have one microphone that’s mostly for the sound of the punch and attack of the drum, and one microphone that’s more for the overall tone of the drum.
A good starting point for capturing the attack of the kick batter is to place a mic someplace inside the kick drum shell. If your drum has no resonant-side head, you’ll have lots of room to place a mic inside the kick. If you have a resonant head on the kick, you may want to get a head with a pre-cut hole, or cut one yourself.
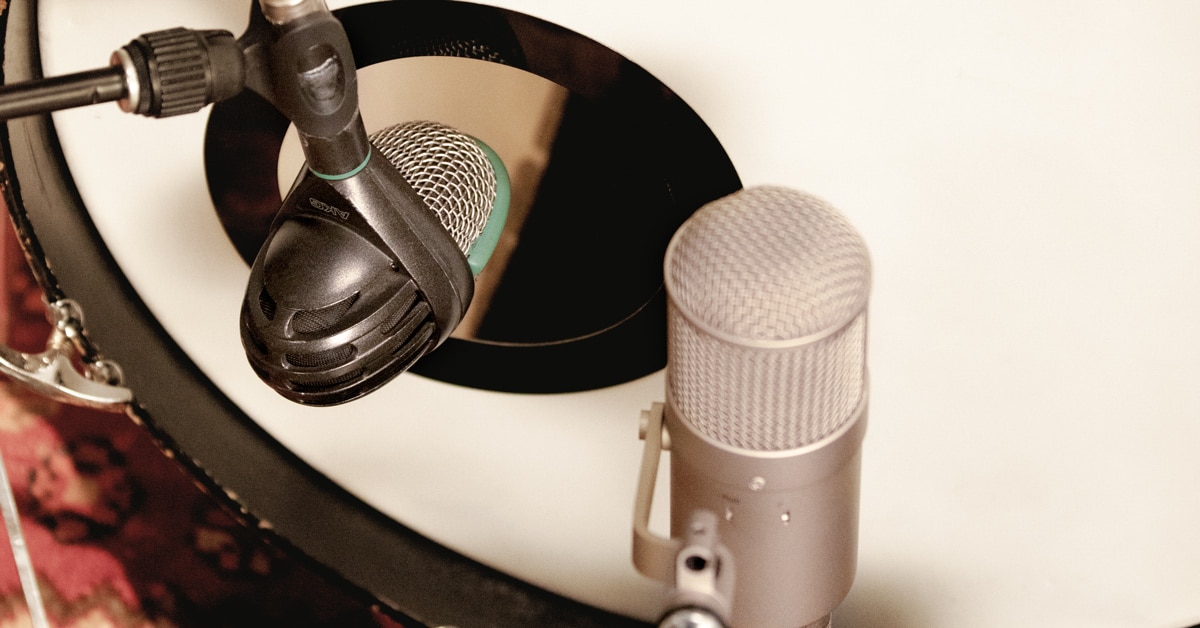
There are many mics built for this “inside the kick” application. Trying a mic like the AKG D112 or Shure Beta 52A should give you a familiar-sounding starting point. The Sennheiser e 902 or Audix D6 are two other kick drum-specific microphones that offer great sounds. The biggest characteristic of this family of mics is that they are designed with a frequency response that’s useful for a modern kick drum sound. You’ll typically hear that these mics have a low-end boost, a dip in the midrange centered around 400Hz or 500Hz, and then a presence peak in the upper midrange.
Two multipurpose mics that are often used inside the kick are the Sennheiser MD 421-II or Electro-Voice RE20. Both of these microphones offer a more linear frequency response compared to the purpose-built kick mics. If I’m after a more natural sound, I will often reach for either of these mics.
The exact placement of this microphone really depends on the drum, the player and the song. It’s important to experiment and find a location that works in the moment. If you’re looking to accentuate the midrange attack of the drum, try placing your microphone dead center, a few inches from the batter head. I find that pulling the mic back to just inside the rim of the resonant-side head tends to give a little more balanced sound. If you’re looking to decrease the attack of the drum, try moving this mic slightly off-center, closer to the drum shell itself. With the inside kick mic placed, we’ll move to our outside microphone.
While the inside microphone covers the punch and attack, the outside mic can be used to add more body and tone to your kick sound. To get a more natural sound, I like to use a standard large-diaphragm condenser for outside the kick. When available, I’ll reach for a Neumann U 47 FET, but I’ve also had great results with an AKG C414. If those are out of your budget, any large-diaphragm condenser that can handle high SPL levels is worth a try.
I like to keep the outside mic in a cardioid pattern to take advantage of some low-end tone changes caused by proximity effect. This sound can be manipulated to great effect by moving the mic closer or farther from the front of the drum. As a starting point, I like to experiment with placements facing straight at the resonant head, anywhere from two to six inches away. I find that the details in the midrange and higher frequencies that a large-diaphragm condenser picks up are really useful. Blending this mic with the inside kick mic can add to the depth of the drum tone. A kick drum is more than just attack and bringing in the right blend of the outside mic really fills out your sound.
We’ve already discussed the impact that moving the outside mic can have with regards to adding body to the kick. The farther you pull back your mic, the more you’ll capture the overall tone emanating from the entire kick drum. However, an important consideration here is that pulling the outside mic back will significantly increase leakage from the rest of the drum kit.
So, how do you deal with that leakage? Try building a little tunnel that goes between the kick drum and the microphone. Using some packing blankets draped over a suitable frame can help isolate that outside mic from the rest of the kick and reduce high frequency leakage, particularly from your cymbals and snare. Finally, remember that low frequencies take a lot of space to propagate. For example, the complete wavelength of 60Hz is almost 19 feet. Listen carefully and find the ideal placement that picks up all that nice low end. You might even want to experiment with a gated mono room mic that is triggered only when the kick drum hits.
Speaking of picking up extra low end, a third mic often added to a kick set up is a subkick mic. This is a special microphone that picks up only low-end frequencies. The use of this mic became popular after people started taking woofers from their Yamaha NS-10 nearfield monitors, wiring them to mic cables and placing them in front of the kick drum. Eventually Yamaha and other mic manufactures started manufacturing specific subkick mics based off this design. This mic is typically placed on the outside of the drum, a few inches away from the resonant head.
Expanding on the Typical Kick Mic Array
After experimenting with a subkick mic, you might consider yet another microphone that can focus more on the midrange, attack and knock of a kick drum. There are a few interesting techniques worth exploring here.
First, and maybe the simplest approach, is to think about the timbre you want for the attack of the drum. Pick a mic that will accentuate that tone and place it inside the kick. I personally love kick drums with more of a “knock” than a “click.” To me, this means the attack has some nice frequency components down in the midrange and lower-mids, instead of the more “clicky” upper midrange. I’ve found some great results picking quirky old dynamic mics to place in the kick drum. I love old Electro Voice mics in this application, like the 635a, RE10 or RE16. But honestly, try just picking up any old handheld dynamic mic and listening to what sort of midrange it can bring out. You might discover a really cool new mic technique.
Another great location for capturing some attack and knock of a kick drum is outside of the drum, on the batter side.
One common technique is to hang a lavalier mic down from the top of the drum, so that it’s dangling right above the kick pedal. You might even want to experiment with an expander or gate on this mic to have it open only when the kick hits.
Another technique is to put a mic under the snare drum, pointed towards the front head of the kick drum. This placement is really more of a whole kit mic, as you’ll get a lot of snare in it too, but the cool tone this mic can add to both the kick and snare makes it worth mentioning here. I’ve had great success with two specific mics in this location. The first is an old Altec “salt shaker” 633a. This is a dynamic mic that falls into the “vintage mic with a distinct midrange” category. The first time I heard the 633a in this position, I was really impressed with the cool crunch it added to the attack of the kick. If you don’t have access to this mic, a Neumann U87 or another large-diaphragm condenser with a cardioid polar pattern can be really cool in this position, too. Again, this position is particularly good at capturing that more knocky type of kick attack.
As another wild card, I’ve also had success with a weird little Crown PZM mic placed on the floor between the snare and kick. As you can see, the Altec, the U 87 and the PZM are not necessarily similar sounding mics, so take that as a cue that it is more about that particular position than anything. Try any mic you can in that location and you’ll probably find some great tones to work with.
Mic Phase Relationships
With all those mic combinations in use, it’s important to keep an ear out for the phase relationships between the microphones. Low end is particularly impacted by microphones being out of phase, so be very careful when positioning your mics.
Think about that big 19-foot, 60Hz waveform I mentioned earlier. Now, picture a line of two mics placed at different distances from the kick. As that huge sound wave begins to propagate from the drum, the positive and negative sides of the waveform will travel toward those mics. Since the low-frequency wave is so long, you can see that at a given point in time, each mic will be picking up a different part of that wavelength. These differences cause the waveforms to add up in different ways when those microphone signals are combined in your mixer. These phase differences can lead to significant changes in the frequency response of your sound once the signals are blended together.
So, what are you listening for? The biggest change you may hear is a cancelation of low end when the signals are out of phase. Since we want to capture the best low end we can for a kick sound, it’s absolutely vital that we don’t run into phase issues. Listen closely as you position your microphones and be sure to use the polarity flip button or switch on your mic’s preamp to see which sounds better.
Thinking About Sub Bass When Mixing
Finally, when thinking of a kick drum, consider the relationship between the low end of the kick and the other bass instruments in a song. When mixing it’s important to only have one instrument occupying the sub-bass frequencies. My approach? Give the subs to the instrument that is the least busy in the arrangement. So, if the bass guitar is playing eighth notes, and the kick is hitting on just the one and the three, give the kick the lower frequencies. Alternately, if the bass is playing whole notes, and the kick is doing a more intricate pattern, let the bass take the subs and make the fundamental low end of the kick a little higher. The key to great sounding low end is a great arrangement of the low-frequency instruments. So, you should be thinking about this early in the production process.
Kick Out the Jams
Whether a kick drum is lending subtle support to a song, or playing punchy driving grooves, it will always be an important foundation for any recording with a drum kit. Using multiple mics to capture the kick can truly help you sculpt the perfect drum tone for a song.