


If you were to ask a group of recording engineers how to mic a guitar amp, the likely consensus would be to put a Shure SM57 right on the cab, pointed at the speaker. This kind of simple setup will give you a familiar and classic electric guitar tone. However, experimenting with various techniques using multiple mics can lead to tones with more depth and realism that won’t have the need to “fix it in the mix.” This article will provide some useful techniques to expand your mic options for getting killer guitar tones in any musical style, using mics ranging from classic dynamics to premium studio condensers and ribbons, plus a surprise or two.
Considering Your Amps, Instruments and Musicians
Before thinking about which mics to grab to record that next guitar part, it’s important to pause and think about the guitar amp, the specific guitar part, and the song.
There’s a wide spectrum of electric guitar tones to consider, from a Les Paul through a Marshall stack, to a Telecaster through a small low-wattage combo amp like a Fender Princeton, all the way to a mellow archtop into a Roland Jazz Chorus. The space between these classic setups is filled with an infinite number of tones, influenced by the player’s choice of guitar, amp and pedals. Take some time to sit with the guitarist and discuss exactly what their setup will be. The same process applies if you’re recording yourself. Don’t just slap up some mics and go. Think about what you want the final result to be.
Outside of the guitarist’s gear, there are a number of variables specific to your recording to consider. For instance, is the player playing with a heavy touch or a light one? Do you want to capture the sound of the physical space where the amp is located? What role will this guitar play in your final mix?
There are certainly a lot of variables to consider during a session. Luckily there are a number of multi-mic techniques that you can apply to any of these situations to help you achieve a great guitar tone.
A New Classic: Combining Dynamic Mics With Ribbon Mics
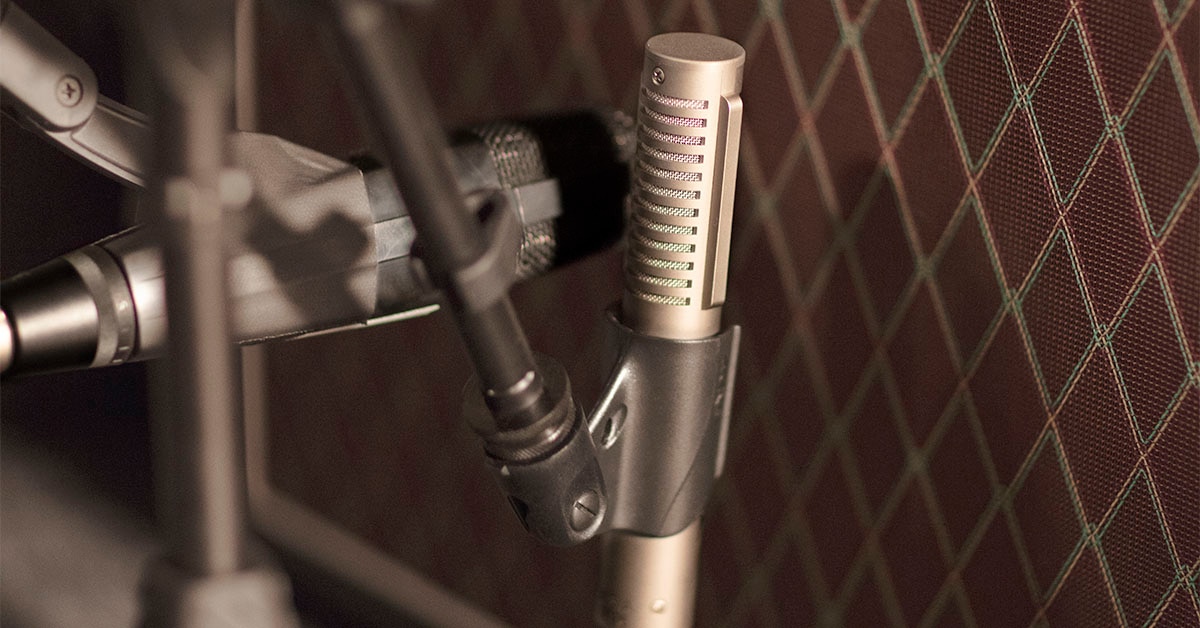
A mic combination that has recently gained popularity is the pairing of a dynamic microphone with a ribbon microphone. This technique has almost become as ubiquitous as the classic “57-on-an-amp” technique, and for good reason.
Dynamics and ribbons each have their own desirable sound qualities for recording electric guitar. Ribbon microphones tend towards a fuller, warmer tone that offers a bit of body. Comparatively, dynamic microphones tend to offer more presence in the midrange as well as more “bite.” While they each work nicely individually, placing each of these on a cab and finding a nice blend results in an extremely balanced tone.
The most common pairing for this setup is the ubiquitous Shure SM57 dynamic and the Royer R-121 ribbon. This has become such a widely adopted technique that Royer now manufactures their own dual microphone clip, specifically designed for the SM57 and R-121.
When placing these mics, I like to start fairly close to the amp, typically between 4 to 6 inches from the speaker. Typically, a guitar speaker has a brighter tone with more attack towards the center of the cone, and a mellower tone out toward the edge of the cone. With this in mind, since the Royer R-121 is a little mellow, I’ll place that towards the center of the speaker, typically right about where the dust cap of the speaker meets the cone. The smoothness of the ribbon mic takes a little bit of the edge off of that more present, center-of-the-cone sound, which I find can be helpful. I’ll then place the SM57 on the side of the R-121 that’s closer to the outer edge of the speaker cone.
If you’re looking for other choices, there are some great options out there. In the dynamic world, consider the Sennheiser MD 421-II, Beyerdynamic M 201, or Electro-Voice’s RE16 and 635A models. For ribbons, look at Beyerdynamic’s M 160, AEA’s NUVO or Royer’s R-10. One quick note on this concept, if you don’t have any of these mics, or even if you don’t have a dynamic and ribbon mic combo, you can still have fun with this technique. Experiment with any two mics that you might have on hand. For the best results — and the most options when blending the mics — be sure that the two mics sound different and have a good contrast in tone.
When working with multiple microphones, being mindful of phase is incredibly important. I always take care to try and line up the capsules of the two mics to ensure the phase of the two separate signals is as aligned as possible. To check the microphones’ phase relationship, pan both mics to the center and start flipping the polarity button on your mic preamp, listening to the combination of the mics. The characteristics of an out-of-phase sound will generally be a lack of low end in the signal, and a filtered, “hollowed out” sound. An out-of-phase sound is somewhat reminiscent of a phaser or flanger pedal stuck in one position without modulation.
When dealing with phase issues, you may need to adjust the placement of the mic capsules. You may find your solution by slightly adjusting one of the mics a few millimeters forward or backward. Sometimes the filtering effects of the “almost-in-phase” mics can be useful, so be sure to listen and pick mic locations that flatter your sound. For this combination, I’ll typically treat these mics as just a single mono source, commit to a blend and sum the two mics together to one track as I am recording.
My Favorite Multi-Mic Technique
A cool variation on this technique that I’ve been experimenting with lately is adding a third mic to the SM57/R-121 combo. I like to add a large-diaphragm condenser to the mix.
So, where does this condenser mic get placed? I like putting it on the speaker on the same plane as the other two mics. The condenser will still be on the front of the speaker cone, but on the other side of the speaker. For example, if the 57 and 121 are on the right side, I’ll put the condenser on the left side, midway between the edge of the speaker cone and the dust cap. I’ve had success with this technique using an AKG C414, a Neumann U87 and Mojave’s MA-200.
Most of the time, I put the condenser in cardioid mode, which picks up plenty of signal upfront, while bringing in a little of the room sound. I’ve also had success with a bi-directional pattern. Bi-directional polar patterns are great for bringing in room sound as they pick up sound equally in front and behind. It’s always interesting to experiment with a variety of polar patterns and see how each impacts the sound. If you’re recording a loud amp, it’s good to work with a condenser that has a built-in pad to prevent the mic’s onboard amp from distorting.
With this three-microphone arrangement, I’ll keep the 57 and 121 summed together to a single track and panned to one side. I’ll then put the condenser on its own track and pan it to the opposite side. As with the two-mic technique, it’s really important to listen for phase issues with the three mics summed together. Some of the phase differences are actually what make this technique interesting. The variations in tone caused by small phase differences and mic tones between these two tracks can give a subtle width to the tone.
I also love this setup because it tends to add a cool realism and depth to the guitar tone. When you’re dealing with a song with a sparse arrangement, it can lend a sense of dimension to the guitar tone while still being super-focused and dry. If you want to really experiment with spaciousness, a room mic is also a fun addition to a guitar recording.
Adding Room Mics to Your Mix
Adding some ambience from a room mic can be a great way to add extra depth and sonic complexity to a guitar tone. Electric guitars are great candidates for room mics, because, at the end of the day, most of us don’t listen to guitar amps with our ears right against the speaker. A room mic can create a special ambience that is unique to your specific recording environment and can set itself apart from a typical guitar sound.
Depending on the size and sound of your room, different mic placements can help you achieve a variety of room tones ranging from some short ambience, to some room reverb, or even a diffuse slap echo effect (if your room is large enough).
When choosing mics for this, I like to pick a multi-pattern large-diaphragm condenser. Having the ability to change polar patterns quickly can help you tailor the ambience that the mic will pick up. For placement of the room mic, experiment with pointing the mic toward the amp for a little more direct sound, or away from the amp to capture more room tone. For a room tone that borders on a diffuse echo, try placing a room mic far from the amp, pointed directly at a wall.
When it comes to blending the room mic in the mix, there are some fun panning and processing options to consider.
When panning the room mic, experiment with the room at the same pan position as the dry signal. This can be a way to give a sense of depth to the guitar track without cluttering the stereo field of a mix. On the other hand, it can be great to smear the image a little bit by panning the room mic opposite the dry signal.
One other approach is to pan the guitar room mic opposite the dry signal, but in the exact same position of another instrument. This can also give the impression of some classic mic bleed. For example, say you have a piano panned to the left, and the guitar to the right. Pan the guitar room to the left, at the same position as the piano track, and blend the level so it sounds like mic spill. This can be a cool way to give the feeling of musicians playing in one space, even if the song was built using isolated overdubs.
Finally, with regard to processing of the room mic, I always like to experiment with some EQ on the room mic. I also like to add a bit of pre-delay sometimes.
For EQ, all bets are off. Start experimenting and see if carving the room tone makes the reverb better in the mix. For a pre-delay, I’ve found that sometimes adding a very short pre-delay-type delay to the room mic track can help the room mic fit in a track better. Experiment with a simple digital delay and try some different options, anywhere from 17–30 milliseconds. A short delay like this shouldn’t sound like a slap, but it can give the dry sound a moment to be focused before the room ambience kicks in.
Additional Mic Techniques
Electric guitars are an interesting sound to record because, in some respects, we are so used to hearing them with effects, that they lend themselves to sonic experimentation. With that in mind, here are some other ideas I’d like to share.
First, experiment with a microphone’s on- and off-axis frequency response. For a given polar pattern, the frequency response will change with regard to the angle at which the sound hits the mic. Omnidirectional patterns tend to be the most even around the mic, while directional patterns have the most changes. Use this to your advantage. Think of pattern selection and placement like a built-in tone control. For example, you may find that a mic’s tone is mellower if you place it at a 45-degree angle to a source. This may come in handy if you find yourself faced with a bright guitar tone you’d like to tame a little bit. Placing the mic at an angle is also a great way to capture the best of both worlds. Try placing a mic at the edge of a speaker, but tilting it at an angle towards the center of the cone. This placement can achieve a sound that offers a great balance between the center cone and speaker edge tones.
Second, a close mic doesn’t always have to be a few inches from the amp speaker. Sometimes pulling a mic back as much as one to three feet from an amp can sound great. This can be especially useful on an amp with multiple speakers, as it gives the sound of the amp more time to develop in space before being captured by a microphone. As you start to pull the mic back, you may find that you’re picking up a lot of room tone, so keep that in mind. This is another scenario where a multi-pattern large-diaphragm condenser is a cool choice. This allows you to experiment with different polar patterns that might let more or less room sound into the mic. If you only have a cardioid dynamic mic, once again, consider angling the mic at the amp as a way to experiment with a blend of direct tone and room ambiance.
Finally, another commonly used position for a second guitar mic is behind the speaker of an open-back guitar cab. This rear mic usually has a bit more low end than a mic placed in front of the amp, so it’s a great choice if you’re after a thicker guitar tone.
Time to Experiment
As I mentioned before, electric guitars are unique in the way they lend themselves to tone shaping and mangling a bit more than some other instruments. With that in mind, remember that when it comes to guitar tones, experiment and don’t stop until you’ve arrived at a tone that complements your song.