


Pianos are a complex instrument to record and there are a number of different mic techniques you can use to capture them. This article will help you understand the basic elements of a piano’s sound and a number of different multi-mic approaches you can take when recording, using mics ranging from traditional handheld vocal mics to high-end studio condensers and ribbons.
A piano’s sound reflects the balance between three different elements. First, there is the initial percussive attack, which comes from the hammer striking the strings. Next, you have the sustain and decay of the vibrating strings. Finally, you have the resonance and reverberations of the piano and the space it’s in.
It’s worth pointing out that the overall sound of a piano we are used to hearing is a combination of sounds from many points on a rather large instrument. It can be a challenge to think about a single point where one microphone can capture all the details of such an expressive instrument. This makes the piano a good candidate for experimentation with a combination of multiple microphones.
Assessing Your Piano
My first step when beginning to place multiple microphones on a piano is to assess the physical aspects of the piano, and the role the specific piano part will play in the song and final mix. Pianos come in many shapes and sizes, from concert grands and baby grands, to full uprights, spinets and even smaller tom thumb pianos. In addition, the intricate mechanical construction of a piano can lead to subtle changes in piano tone.
If you’re lucky enough to be able to choose between multiple pianos, you’ll likely want to pick a piano that matches the style of music you’re recording. If you’re working on an upbeat pop song, you might lean towards a brighter piano tone. A more mellow jazz song? You’ll probably look for a darker tone.
Then there is the situation where a classic honky-tonk piano sound may work best. In this case, harder piano hammers and a little inconsistency in the tuning can be evocative of a piano that’s been sitting in a bar room for years, accompanying rowdy sing-alongs.
When choosing your piano, consider where the piano will fit in the final mix. Is it featured prominently, or does it play a supporting role in a dense song arrangement? All of these considerations should be running through your mind.
Stereo Mics and a Grand Piano
The simplest multi-mic arrangement on a piano is a stereo pair. Since the high strings and low strings of a piano are spread out over a large physical space, a well-positioned stereo pair will help capture a more complete sound.
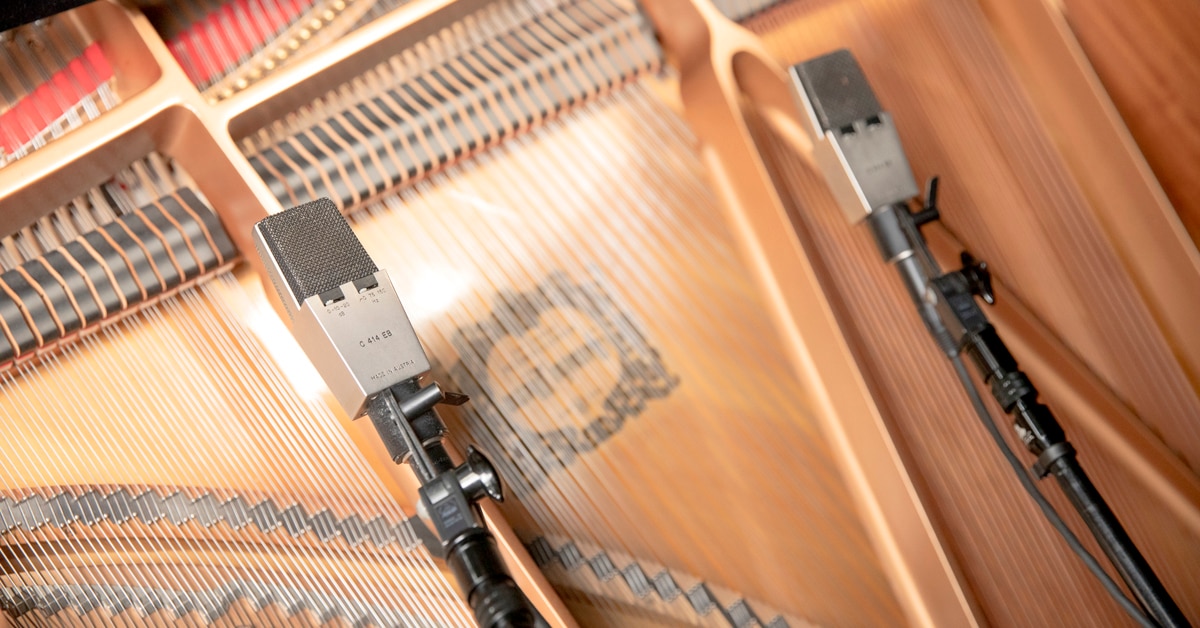
Let’s start by considering a grand piano. My first choice for a stereo pair on a grand piano would feature a pair of classic large-diaphragm condenser mics. Three of my favorite choices are Neumann U87s, U67s or AKG C414s. More budget-minded options include AKG’s C214 and C314s, and Blue Microphones’ Baby Bottle and Bluebird.
Working with a stereo mic pair, my initial approach is to open the piano lid all the way and place the mics about a foot above the hammers. It’s also important to speak to the player to understand which register of the piano their playing will focus on. This may have an impact on final placement or angling of your mics.
I usually position my spaced mic pair with one microphone over the middle-high strings and one over the middle-low strings. This position results in a very focused sound and, with that in mind, I’ll start with the mic in the cardioid polar pattern to further accentuate that focus. This particular approach should give a strong, balanced sound, but sometimes the addition of extra mics can go a long way to further tailor the tone to the song you’re recording.
Sometimes I want to add a little ambience to my piano sound. To achieve this, I often add a third mic at the other end of the grand piano, over the soundboard. I typically place the mic outside the edge of the piano so it’s “looking” across the soundboard.
When choosing the specific microphone I want to use for this, I typically go with another large-diaphragm condenser or ribbon microphone.
Since the goal for this mic is to collect some ambience, it’s great to work with microphones that have bi-directional or omni polar patterns. The bi-directional pattern on a Royer R-121 or R-122 can work really well in this application. If I end up going with a condenser in this position, I typically choose one with a variable polar pattern so I can experiment with an omni- or bi-directional pattern.
Take this technique to another level by using a stereo mic array in this location. You may want to create an additional stereo spaced pair for this placement, or even use a dedicated stereo mic. For a stereo ribbon option, take a look at Royer’s SF-12 or AEA’s R-88. If you’d prefer a condenser, consider the Avantone CK-40.
Before moving on, it’s worth remembering that this arrangement shouldn’t be viewed exclusively as an accompaniment to the mics over the hammers. Sometimes the soundboard tone can end up being the perfect fit for a song. As always, you’ll have to make the determination on a case-by-case basis and create a blend that fits the needs of each song.
Finally, there’s one last mic placement to add to your arsenal. Every so often I’ll use a dynamic mic, perhaps a Sennheiser MD 441-U or Shure SM57, and stick it pointed down into one of the holes in the piano harp. You’ll want to really angle it in there so it is living below the edge of the harp, inside that hole.
I’ve always thought that this technique is a great way to capture more energy and add some character to the piano’s sound. Often, I’ll give this mic a little more extreme EQ or compression, informed by the song, and tuck it underneath the main mics in the blend.
Upright Piano Mic Techniques
When recording a traditional upright piano, I tend to follow the same general principles of capturing a soundboard tone and a hammer tone, but I may end up tweaking the mic selection and placement slightly.
When trying to capture the tone coming from the hammers of an upright piano, mic placement can be a little tricky. The biggest challenge is that the player is sitting right in front of the hammers.
When positioning my mics, the first thing I’ll do is remove the front cover of the upright and expose the hammers. Depending on the room and where the piano is placed, you may be able to bring the mics in over the top of the piano and angle them down at the hammers. A stereo pair can be useful here, with similar spacing to the grand piano.
One of the biggest challenges that comes with recording an upright is that you may pick up more noise from the player since the mics are much closer to them. To combat this, when I mic the hammers of an upright, I like to do it in mono, coming in from the side with a bi-directional ribbon mic like the Royer R-121. I’ll usually set the ribbon on the treble side of the keyboard and try to angle the null of the bi-directional pattern at the player as much as I can.
Miking the soundboard of an upright has its own unique set of challenges. With some uprights, you can easily remove the bottom panel, exposing the harp and soundboard for miking. This can be an interesting place to set a mic but, again, the player’s positioning might make it tough to get in there. Additionally, placing a mic down there could lead to some unwanted foot pedal noise. If everything is working in your favor with regard to the player and the piano, a tube mic, such as the large-diaphragm Mojave MA-200, can sound great placed on the lower right side of the piano.
Another technique I’ve been exploring is placing mics around the back of the upright, which captures a more ambient soundboard tone. While a spaced pair of large-diaphragm condensers can be great, my favorite choice for this setup is a pair of small-diaphragm Mojave Audio MA-100 tube mics. If I don’t have access to my MA-100s, I’ll try a Neumann KM-84 [Note: Neumann discontinued the KM-84 in 1992, replacing it with the KM-184]. I’ve also had great results in this position with Lauten Audio LA-120s, Warm Audio WA-84s and Telefunken ELA M 260s.
To figure out the ideal placement of my MA-100s, I divide the rear of the piano into thirds, positioning the mics somewhere along those imaginary dividing lines. The science is imperfect, but it’s a great starting point for capturing a well-balanced sound.
Finally, we can’t forget the power of the humble dynamic microphone. I’ve gotten great results leaving the front panel of the piano on, opening the top lid and hanging a Shure SM57 inside. Sometimes, I like reaching into my mic locker and subbing in an Electro-Voice RE50 or 635A. Each of these mics can add unique character and color to your sound.
Using Room Mics to Capture Your Piano Sound
A discussion of multiple mic combinations wouldn’t be complete without touching on room mics.
Figuring out the ideal room microphones and position depends on the space in which you’re recording. Consider which aspects of a room’s tone you want to capture and how it will work into your overall mix.
I tend to like bi-directional mics as room mics. If I’m going for a mellower sound, I’ll reach for a ribbon. If I’m going for a brighter sound, I’ll reach for a condenser. The nulls in the bi-directional pattern can be useful in bringing more or less direct piano sound into the room mics. I like to start with the null facing the piano, for as much direct sound reduction as possible, then rotate to taste from there.
Sometimes a brighter room tone can be a cool way to add some presence to the piano tone. Since the room sound will arrive a little later in time than the direct sound, it can extend the perceived brightness of a track in a way that is much more natural than just cranking up the presence on the piano’s close mics. The same concept can work at the other end of the frequency spectrum. A warm room tone can add some body to the tone, without having to overcompensate with EQ on the close mics.
Microphone Balance and Panning
With all these mic combinations, you’ll inevitably have some decisions to make regarding blending and panning. As always, follow your gut on what blend seems to benefit the song. If it sounds right, it is right.
I’d recommend resisting the urge to pan any stereo pair hard right and hard left. In a dense mix, a super wide piano takes up too much real estate. In this case, think of the stereo mics as a method for capturing all the complex tones of the instrument, but not necessarily capturing a huge stereo picture.
When you’re working on a sparse track that has a little more space, you can create a great sense of depth by experimenting with the pan positions of the hammer mics, the soundboard mics you placed for ambience and the room mics.
Those recommendations aside, if you’re looking to push the envelope a bit, you can make some memorable piano sounds by taking these more traditional mic placements and using some unexpected panning and blends. If it doesn’t work, just use the “Undo” shortcut on your keyboard.
Break With Tradition
Speaking of pushing the envelope, I’ll leave you with two less-than-mainstream mic choices and placements to add to your piano tonal palette.
First, try using an unexpected mic underneath a grand piano. I once had a Shure BETA 52A kick drum mic stuck under a grand piano that ended up capturing a really cool tone to blend with the other mics. Just because a mic is designed for a specific application doesn’t mean it can’t give great results in another.
Second, experiment with contact mics. These mics are typically used to create a DI source for stringed instruments, but they can add a cool tone to just about any instrument. On a piano, they can be great for capturing its mechanical sound, which could add a nice bit of character to your overall blend.
Hopefully this discussion will inspire you to investigate some new mic combinations on your next piano recording. If you don’t have the exact mics mentioned above, the overarching concepts can be applied to many mics that share similar sonic qualities. And, as always, experiment, experiment, experiment. You may stumble on your own unique mic combination or placement.